Introduction
Picture yourself trying to whip egg whites by hand for fifteen minutes until your arm feels like it might fall off. Or imagine attempting to knead bread dough manually for ten minutes straight. Now imagine a powerful machine doing all that work while you simply watch and occasionally scrape down the bowl. That’s the magic a stand mixer brings to your kitchen, transforming exhausting tasks into effortless ones.
A stand mixer is more than just a convenience appliance. It’s a true workhorse that can revolutionize how you approach baking and cooking. Whether you’re making cookies, bread, pasta, or even shredding chicken, the right stand mixer becomes an indispensable kitchen companion. These powerful machines have earned their permanent spot on countertops in homes and professional kitchens worldwide.
In this comprehensive guide, you’ll learn everything you need to know about stand mixers. We’ll explore what makes them different from hand mixers, the key features to consider when buying, and which brands offer the best value. You’ll discover the essential attachments that expand functionality, maintenance tips to keep your mixer running smoothly, and techniques that help you get professional results. Whether you’re a beginner baker or an experienced home cook, understanding stand mixers will help you make the right choice and use this kitchen tool to its full potential.
What Is a Stand Mixer and How It Works
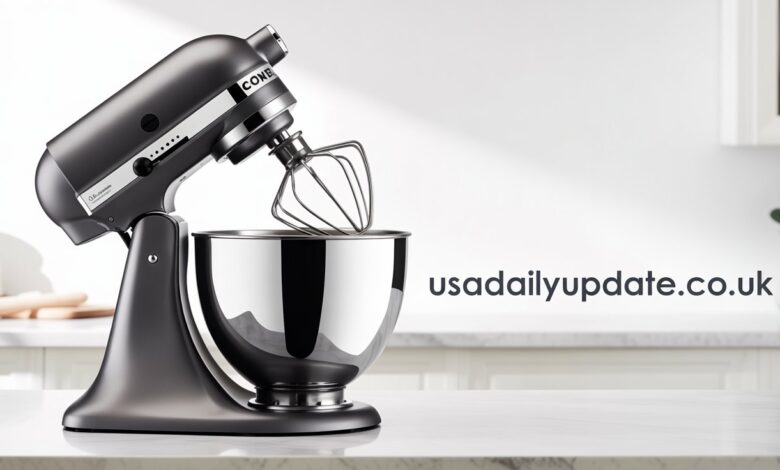
A stand mixer is a stationary electric mixer with a motor housed in the base that drives mixing attachments through a planetary mixing action. Unlike hand mixers that you hold and move around, stand mixers stay in one place while the mixing head rotates around the bowl. This hands free operation lets you multitask while your ingredients mix, whip, or knead.
The planetary action means the attachment moves in one direction while rotating on its own axis in the opposite direction. This ensures the beater reaches every part of the bowl for thorough mixing. You won’t find unmixed pockets of flour or butter hiding at the bottom. The design is both elegant and highly effective for consistent results.
Most stand mixers feature multiple speed settings, typically ranging from a slow stir to a fast whip. The motor power varies by model, usually between 250 and 1000 watts for home models. More powerful motors handle heavier doughs and larger quantities without straining. The bowl capacity ranges from 3 quarts for compact models to 8 quarts for professional grade mixers.
The basic components include the motor base, the tilt head or bowl lift mechanism, the mixing bowl, and interchangeable attachments. Quality stand mixers are built with metal gears and sturdy construction designed to last decades. When properly maintained, a good stand mixer can serve multiple generations of bakers.
Stand Mixer vs Hand Mixer: Key Differences
The most obvious difference is that stand mixers sit on your counter while hand mixers you hold in your hand. This might seem trivial, but it fundamentally changes how you work. With a stand mixer, you can add ingredients gradually, check recipes, or prep other components while mixing continues. Hand mixers require constant attention and one hand dedicated to holding the device.
Power is another significant distinction. Stand mixers typically offer 300 to 1000 watts compared to hand mixers’ 150 to 300 watts. This power difference matters enormously when working with thick cookie dough, bread dough, or large batches. Hand mixers struggle or burn out with tasks that stand mixers handle effortlessly.
Capacity and volume differ dramatically between these tools. Stand mixers accommodate much larger quantities, making them ideal for batch baking or cooking for crowds. Most can handle dough for two loaves of bread or several dozen cookies at once. Hand mixers work better for small tasks like whipping cream for one dessert.
The price gap reflects these differences. Hand mixers cost between $20 and $100, while stand mixers range from $200 to over $600. The investment in a stand mixer pays off if you bake regularly or tackle demanding recipes. For occasional light mixing, a hand mixer might suffice and save considerable counter space.
Essential Features to Consider When Buying
Motor power determines what your stand mixer can handle and how long it will last. Look for at least 300 watts for basic baking, 500 watts for regular bread making, and 700+ watts for frequent heavy duty use. Underpowered mixers struggle with thick mixtures and may burn out prematurely. The wattage rating gives you a reliable indicator of capability.
Bowl capacity should match your typical batch sizes. A 4.5 to 5 quart bowl suits most home bakers and handles standard recipes comfortably. Larger families or serious bakers benefit from 6 to 8 quart capacities. Smaller 3 to 4 quart mixers work well for couples or individuals with limited counter space.
Tilt head versus bowl lift design affects both convenience and stability. Tilt head models allow easy access by tilting the motor head back to remove the bowl or change attachments. Bowl lift designs use a lever to raise and lower the bowl, providing more stability for heavy mixtures. Neither is universally better; choose based on your preferences and typical tasks.
Speed settings provide control for different mixing tasks. Most mixers offer 6 to 10 speeds, which is adequate for home use. A slow start function prevents ingredient splatter when you first turn on the mixer. Variable speed control gives you precise adjustments for optimal results with different recipes.
Build quality and construction materials impact durability and performance. Metal gears outlast plastic ones significantly. Die cast metal housings resist vibration better than plastic. Heavier mixers stay in place better during operation. These quality indicators often correlate with price but ensure your investment lasts.
Top Stand Mixer Brands and Models
KitchenAid dominates the home stand mixer market with their iconic designs and reliable performance. Their Classic series starts around $300 and handles most home baking needs adequately. The Artisan series at roughly $400 offers more colors and slightly more power. The Professional series provides commercial grade capability for serious home bakers. KitchenAid’s widespread availability means easy access to attachments and replacement parts.
Cuisinart offers budget friendly options that deliver solid performance without premium prices. Their stand mixers typically cost $200 to $350 and include useful features like countdown timers and extra attachments. The quality doesn’t quite match KitchenAid’s legendary durability, but they represent excellent value. For casual bakers or those on tighter budgets, Cuisinart provides a capable entry point.
Bosch mixers take a different design approach with their unique bowl and drive system. Their models excel at bread making and handling large quantities. The design feels less familiar to those accustomed to traditional mixers, but devotees swear by their performance. Prices range from $400 to $600 depending on capacity and features.
Ankarsrum (formerly Assistent Original) comes from Sweden with a distinctive roller and scraper system instead of traditional beaters. This design excels at kneading dough and mixing large batches. The $700+ price tag appeals to serious bread bakers who value the unique approach. The learning curve is steeper than conventional mixers.
Hamilton Beach and Sunbeam provide affordable options under $200 for light use. These mixers handle basic tasks but lack the power and durability of premium brands. They suit occasional bakers who don’t want to invest heavily in equipment. Expect to replace them more frequently than higher quality alternatives.
Must Have Attachments and Their Uses
The flat beater (also called paddle attachment) is your workhorse for general mixing. It handles cookie dough, cake batter, mashed potatoes, and countless other tasks. The flat surface with a slight curve scrapes the bowl sides as it mixes. This attachment comes standard with virtually every stand mixer and sees the most frequent use.
The wire whip (or whisk) incorporates air into ingredients for light, fluffy textures. Use it for whipping cream, beating egg whites, making meringue, or creating mousse. The multiple wires trap and fold in air as they move through the mixture. This attachment transforms what would be an arm exhausting task into something effortless.
The dough hook kneads bread, pizza, and pasta dough with minimal effort. Its spiral or C shape mimics hand kneading by stretching and folding the dough. This attachment lets you make artisan breads without the physical work traditional recipes require. The mixer develops gluten structure while you attend to other tasks.
Optional attachments expand your mixer into a multipurpose appliance. Pasta rollers and cutters turn your stand mixer into a pasta making station. Meat grinders, food processors, spiralizers, and ice cream makers all connect to the power hub. These attachments cost extra but transform your mixer into something far more versatile than just a mixing tool.
Some specialized attachments serve specific needs. Flex edge beaters have a rubber edge that constantly scrapes the bowl, reducing the need to stop and scrape manually. Balloon whisks provide even more air incorporation than standard wire whips. Pastry beaters work specifically for cutting butter into flour for pastries and biscuits.
How to Use Your Stand Mixer Properly
Start by securing the bowl properly in place before adding any ingredients. For tilt head models, tilt the head back, place the bowl on the base, and twist to lock. For bowl lift designs, position the bowl on the pins and raise it into position. A properly secured bowl won’t wobble or shift during operation.
Add your ingredients to the bowl before turning on the mixer. Starting with an empty running mixer and then adding ingredients creates unnecessary splatter. Follow your recipe’s order of adding ingredients for best results. Most recipes have you cream fats and sugars first, then add other ingredients progressively.
Begin mixing at low speed to incorporate ingredients without creating a flour cloud or splatter. Once ingredients are combined, gradually increase to the speed your recipe requires. Don’t jump straight to high speed unless your recipe specifically instructs you to do so. Gradual speed changes give you better control and reduce mess.
Stop the mixer periodically to scrape down the bowl sides with a rubber spatula. Even with good mixing action, some ingredients stick to the bowl walls. Scraping ensures everything gets properly incorporated. Turn off the mixer completely before scraping near the beater to avoid accidents.
Know when to stop mixing to avoid overworking your batter or dough. Overmixing develops too much gluten in cakes and muffins, making them tough. Watch for the texture changes your recipe describes rather than just mixing for a set time. Different ingredients and temperatures affect mixing times.
Maintaining and Cleaning Your Stand Mixer
Regular cleaning keeps your stand mixer hygienic and functioning properly. Wipe down the exterior with a damp cloth after each use to remove splatter and dust. The motor housing should never be submerged in water. Use a slightly damp cloth and dry immediately to prevent water entering the motor.
Most mixing bowls and attachments are dishwasher safe, but handwashing extends their life. Hot soapy water removes most residues easily. For stubborn dried on dough, soak attachments before washing. The bowl handle and any wooden parts should be handwashed to prevent damage.
The area where attachments connect to the mixer head needs occasional attention. Food particles and grease can accumulate in this hub over time. Wipe it clean with a damp cloth and check that the attachment pins move freely. A small amount of food grade mineral oil on the hub occasionally keeps things operating smoothly.

Check the beater to bowl clearance periodically. The beater should come very close to the bowl bottom and sides without scraping. If it’s hitting the bowl or sitting too high, you can adjust it. Most mixers have an adjustment screw documented in your user manual. Proper clearance ensures thorough mixing.
Avoid overloading your mixer beyond its rated capacity. Consistently overworking the motor shortens its lifespan. If your mixer strains, smells hot, or makes unusual noises, you’re likely pushing it too hard. Reduce batch sizes or upgrade to a more powerful model.
Common Stand Mixer Problems and Solutions
The mixer head wobbling during operation usually indicates loose screws or worn mechanisms. Check and tighten any accessible screws on the hinge area. If the problem persists, the internal gears may be wearing. This often happens with lower quality mixers or those heavily used for many years.
Attachments slipping during use means the attachment pin isn’t fully engaged. Remove the attachment completely and reinsert it, ensuring you hear and feel it click into place. Some attachments require a slight twist to lock properly. Worn attachment hubs on older mixers sometimes lose their grip.
The mixer not starting at all suggests electrical issues. Check that it’s plugged in properly and the outlet works. Many mixers have thermal overload protection that shuts them off if they overheat. Let the mixer cool for 30 minutes and try again. If it still doesn’t work, the motor may need professional repair.
Unusual noises like grinding or squealing indicate internal problems. Some noise is normal, especially with gear driven mixers. However, new sounds or significantly louder operation suggests worn gears or lack of lubrication. Professional service can diagnose and fix these issues before complete failure.
The mixer overheating during use means you’re either overloading it or running it too long without breaks. Let it rest for 15 to 20 minutes between heavy batches. Consider upgrading to a more powerful mixer if you regularly work with quantities that strain your current model.
Stand Mixer Recipes to Master
Bread baking showcases your stand mixer’s dough kneading abilities. Start with a simple white bread or whole wheat recipe. The mixer develops gluten structure in 8 to 10 minutes compared to 15 to 20 minutes of hand kneading. Watch the dough transform from shaggy and sticky to smooth and elastic.
Cookie recipes benefit from the creaming method done properly in a stand mixer. Beating butter and sugar together incorporates air for lighter cookies. The paddle attachment blends ingredients thoroughly without overmixing. You can mix an entire batch of chocolate chip cookie dough in five minutes.
Cakes achieve their light texture through proper creaming and mixing technique. The stand mixer maintains consistent speed for even batter texture. Layer cakes, pound cakes, and butter cakes all improve with proper stand mixer technique. Just remember to stop before overmixing once flour is added.
Meringues and whipped cream become effortless with the wire whip attachment. Stiff peaks that would take 15 minutes by hand happen in 3 to 4 minutes. The consistent speed and power create more stable meringues than most people can achieve manually. Swiss or Italian meringue buttercream becomes actually doable for home bakers.
Pizza dough is another area where the stand mixer shines. The dough hook kneads the dough to the perfect consistency for stretching. You can make restaurant quality pizza at home without the arm workout. The mixer also makes it practical to prepare dough for multiple pizzas at once.
Stand Mixer Accessories Worth Buying
A pouring shield attaches to the bowl and prevents splatter while allowing you to add ingredients through an opening. This accessory keeps your counter cleaner and makes gradual ingredient addition easier. Some mixers include this, while for others it’s an add on purchase. The modest investment pays off quickly in reduced cleanup.
Extra bowls let you prep multiple components without washing between tasks. Having a second bowl means you can make bread dough in one and immediately start cookie dough in another. Glass bowls allow microwave warming if needed. Stainless steel bowls are more durable and don’t stain.
The pasta roller and cutter attachments transform your mixer into a pasta making machine. Fresh pasta tastes noticeably better than dried and isn’t difficult with the right tools. The three piece set typically includes a roller and both fettuccine and spaghetti cutters. Homemade pasta impresses dinner guests enormously.
A food grinder attachment handles meat grinding for burgers, sausages, and more. You control exactly what goes into your ground meat without mystery additives. The same attachment often includes shredding plates for vegetables. This versatility makes it one of the most useful optional accessories.
Splash guards that aren’t brand specific often work across different mixer models. These clear plastic shields snap onto the bowl and contain splatter while letting you see inside. They cost much less than brand name versions and perform the same function. Check sizing compatibility before purchasing.
Making the Most of Your Stand Mixer Investment
Learn your mixer’s capabilities and limitations through experience. Start with simpler recipes and work up to more challenging ones. Each mixer has its own personality regarding how it handles different tasks. Understanding your specific model’s strengths helps you use it more effectively.
Organize attachments and accessories for easy access. A nearby drawer or cabinet dedicated to mixer parts keeps everything together. Label less frequently used attachments if needed. Having everything organized means you’ll actually use the attachments rather than leaving them in boxes.
Join online communities dedicated to your mixer brand. These groups share recipes, tips, troubleshooting advice, and creative uses. You’ll discover techniques and uses you never considered. The collective knowledge helps you get more value from your investment.
Consider the total cost of ownership when choosing a mixer. A $400 mixer that lasts 20 years costs far less over time than a $200 mixer replaced every 4 years. Factor in attachment costs and availability. Sometimes spending more initially saves money and frustration long term.
Register your mixer’s warranty and keep purchase documentation. Quality mixers come with substantial warranties reflecting the manufacturer’s confidence. Should problems arise, proper documentation ensures you’re covered. Some extended warranties may be worth the cost for expensive models.
Conclusion
A stand mixer represents one of the best investments you can make in your kitchen if you bake or cook regularly. From basic cookie dough to artisan breads, fresh pasta to whipped cream, this versatile appliance handles countless tasks with ease. The right stand mixer matches your needs, fits your budget, and delivers reliable performance for years or even decades.
Choosing a stand mixer involves balancing power, capacity, features, and price against your specific requirements. Whether you opt for a premium KitchenAid, a budget friendly Cuisinart, or something in between, understanding what you need ensures satisfaction with your purchase. The stand mixer becomes more valuable as you discover its full range of capabilities.
Proper use and maintenance keep your mixer performing at its best throughout its lifespan. Simple habits like regular cleaning, proper loading, and appropriate speed selection prevent most problems. When issues do arise, many have simple solutions you can handle yourself. Professional service handles anything beyond basic troubleshooting.
Your stand mixer has the potential to transform how you approach cooking and baking. The convenience, consistency, and capability it provides encourages you to tackle recipes you might have avoided otherwise. What will you make first with your stand mixer? Share your favorite stand mixer recipes and tips with others embarking on their baking journey.
Frequently Asked Questions
What is the best stand mixer for home use?
The KitchenAid Artisan series is widely considered the best all around stand mixer for home use, offering excellent performance, durability, and value around $400. It handles most home baking tasks easily with its 325 watt motor and 5 quart bowl. For those on tighter budgets, Cuisinart offers solid alternatives starting around $200, while serious bakers might prefer the more powerful KitchenAid Professional series.
How much should I spend on a stand mixer?
Plan to spend $200 to $400 for a quality stand mixer that will last many years. Models under $200 typically lack power and durability for regular use. The $300 to $400 range offers the best balance of capability and value for most home bakers. Spending over $500 makes sense only if you bake frequently, make bread regularly, or need commercial grade capacity.
Can a stand mixer knead bread dough?
Yes, stand mixers excel at kneading bread dough with the dough hook attachment. Most home stand mixers can knead dough for one to two loaves of bread in 8 to 10 minutes. Look for at least 300 watts of power for basic bread making and 500+ watts for regular bread baking or whole grain doughs. The mixer develops gluten while you attend to other tasks.
What size stand mixer bowl do I need?
A 4.5 to 5 quart bowl suits most home bakers and handles standard recipe quantities comfortably. This size accommodates dough for two loaves of bread or several dozen cookies. Larger families or frequent entertainers benefit from 6 to 8 quart capacities. Smaller 3 to 4 quart mixers work for couples or those with limited space but restrict batch sizes.
Are stand mixer attachments universal?
No, attachments are specific to each brand and often to particular model lines within brands. KitchenAid attachments fit most KitchenAid models but won’t work with Cuisinart or other brands. Check compatibility carefully before purchasing attachments. Some third party manufacturers make attachments compatible with specific brands, but verify compatibility to avoid expensive mistakes.
How do I clean my stand mixer?
Wipe the motor housing with a damp cloth after each use, never submerging it in water. Most bowls and attachments are dishwasher safe but last longer with handwashing in hot soapy water. Clean the attachment hub periodically where food particles accumulate. Dry all parts thoroughly before storing to prevent rust on metal components.
Why does my stand mixer smell hot?
A hot smell indicates your mixer is working harder than it should, either from overloading, extended operation, or thick mixtures. Let it cool for 30 minutes before continuing. Reduce batch sizes or mix in shorter intervals with breaks. If the smell persists with normal use, the motor may be wearing out and need professional service.
How long do stand mixers last?
Quality stand mixers from reputable brands typically last 15 to 30 years with proper care and maintenance. KitchenAid mixers are famous for multi generational longevity. Budget models may last 5 to 10 years with lighter use. Longevity depends on build quality, frequency of use, maintenance habits, and whether you exceed the mixer’s capacity regularly.
What’s the difference between tilt head and bowl lift mixers?
Tilt head mixers have the motor head that tilts back for easy bowl and attachment access, making them popular for home use. Bowl lift designs use a lever to raise and lower the bowl, providing more stability for heavy mixtures and larger capacities. Neither is universally better; choose based on your typical tasks and personal preference.
Can I use a stand mixer for mashed potatoes?
Yes, the flat beater attachment works excellently for mashed potatoes, creating smooth, creamy results effortlessly. Start at low speed to avoid splatter and gradually increase. Don’t overmix or potatoes become gluey from overdeveloped starch. The stand mixer also handles other vegetables like sweet potatoes and cauliflower mash with ease.
Also Read Academy Award for Best Original Score: Ultimate Winners Guide 2025